User Profile

You will find the user profile in the top right corner of the navigation bar.
SSH Key Setup
Users that want to interact with version control systems like GitHub or GitLab, can use the SSH Key setup in their profile.
Setting up SSH Keys in the user profile will create a working .gitconfig on each assembly automatically once a session starts.
The created .gitconfig can be customized as described in section .gitconfig-Templating
For SSH Key setup to work properly, users must create a personal access token in their version control system that has permissions to setup public keys in the user profile.
In case of GitLab this corresponds to setting the api scope for the access token. For GitHub, a personal access token with admin:public_key scope is required.
Personal Tokens for SSH Key Setup
In contrast to Version Control Access for veHaaS access tokens it is necessary to use a personal access token here.
.gitconfig-templating
To work with external customer the default .gitconfig does not work, due to self-signed certificates, ...
Therefore we introduced a feature to add the possibility to template the .gitconfig.
If no template is available, veHaaS will use the internal default one, which corresponds to:
If you need to customize it create a file called .gitconfig_default.
The content should be the same as the default template, but can be extended however you like.
Please do not mess with ssh-key settings, and rely on the SSH Key Setup
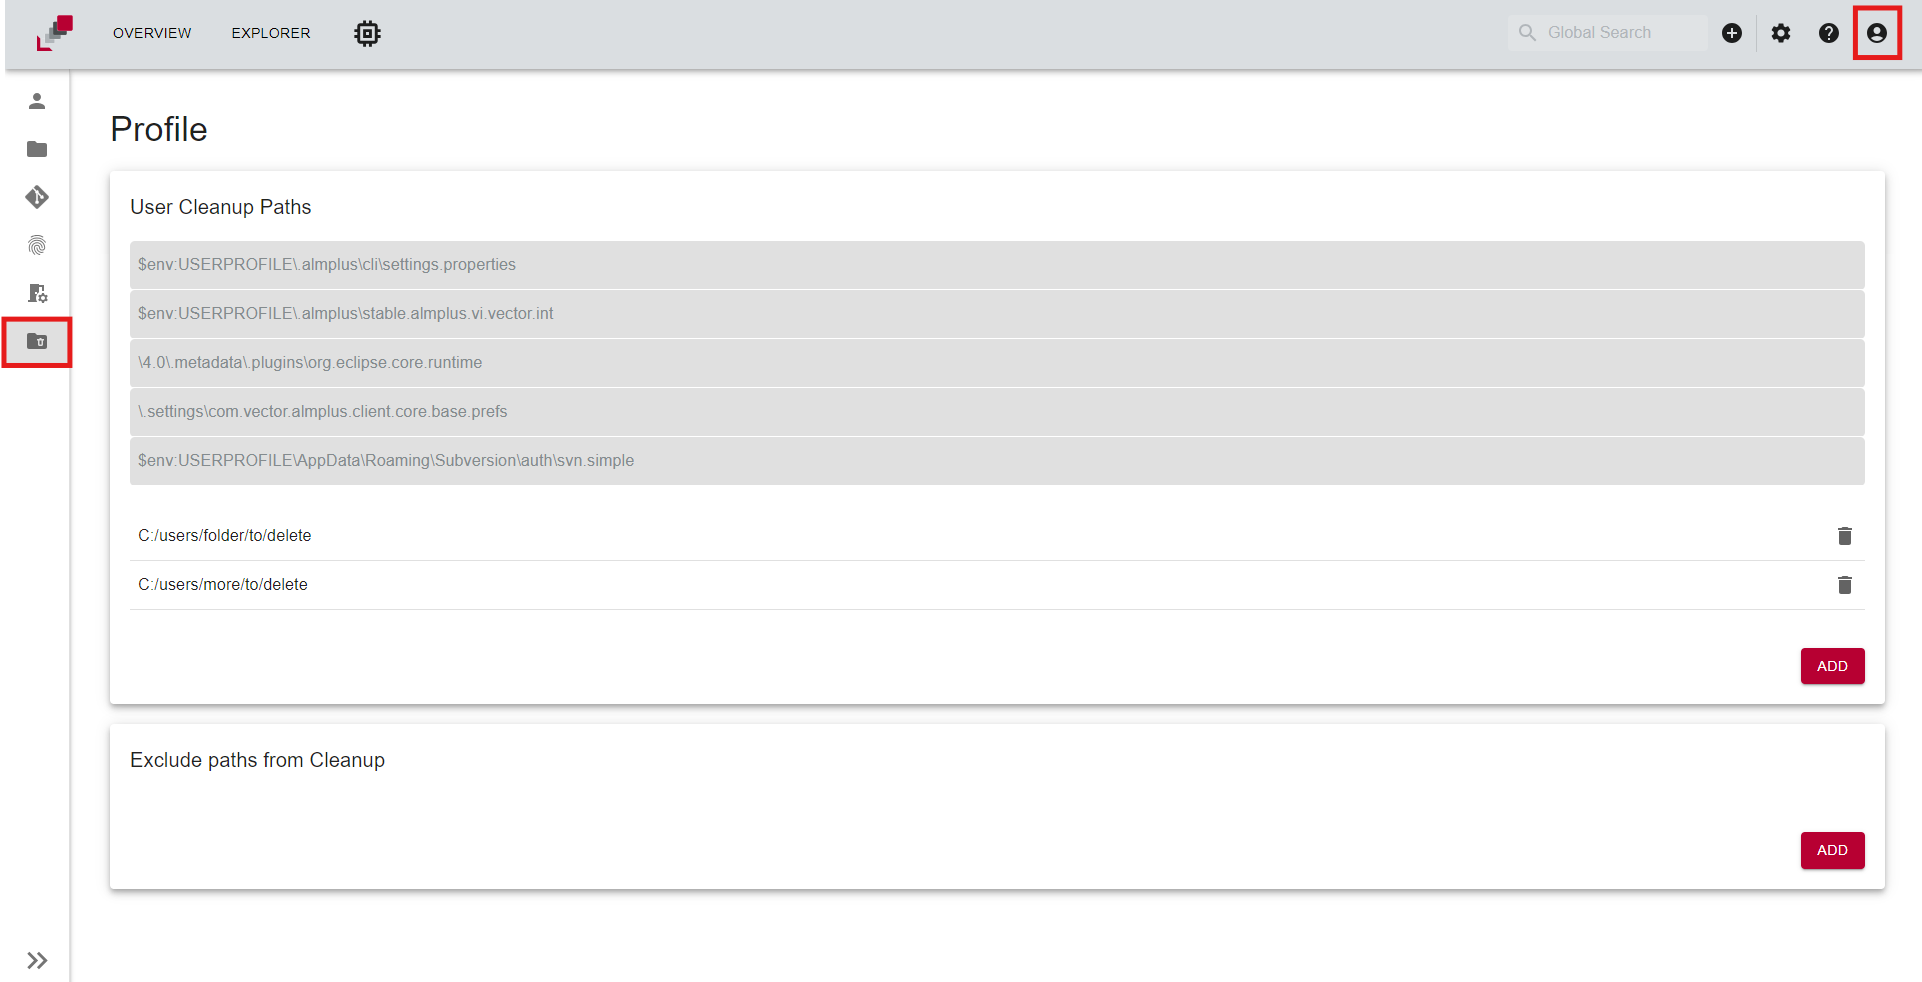
User Cleanup Paths
To clean up and delete paths from the VM after your sessions you can add them to the User cleanup paths.
The user cleanup paths page is located on the user profile page under the User Cleanup Paths tab.
Cleanup Paths
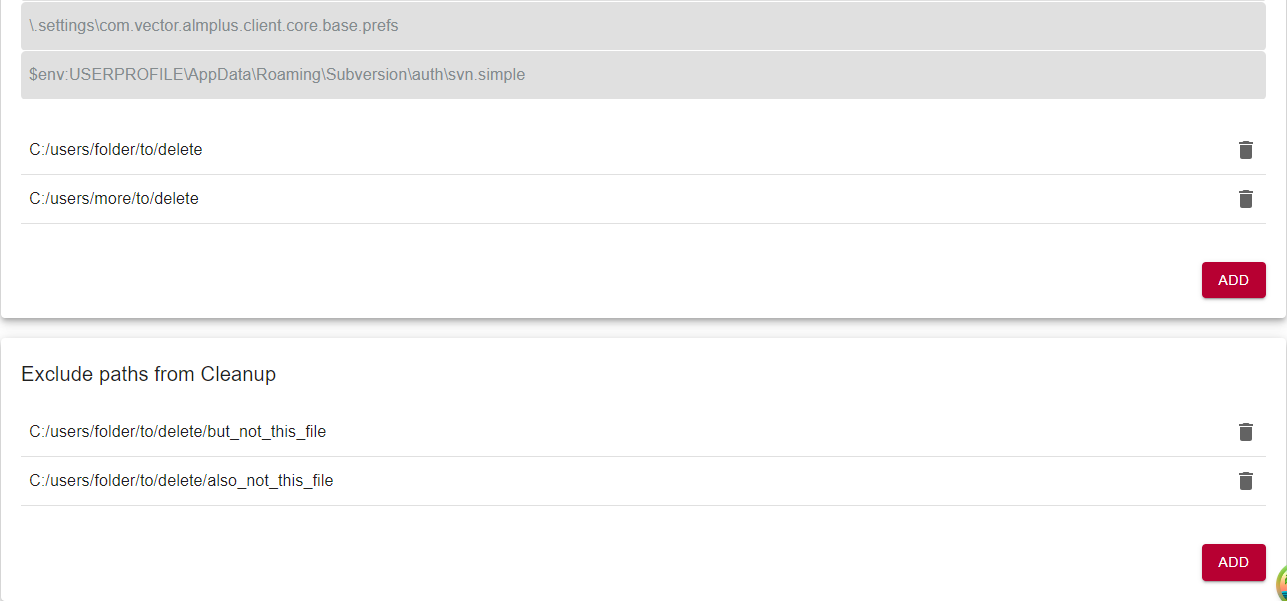
There are default paths that are always deleted after a session. You can add additional paths that should be cleaned up. It is possible to include directories or files.
Paths can be added with the Add Path button and you can delete paths by clicking the bin icon on the right.
Default paths can not be removed from cleanup.
Cleanup paths should be used with care!
Files will be deleted permanently on the virtual machine and other users will be affected by your actions.
Exclude Paths
It is also possible to exclude paths from the cleanup. This can be useful if you want to delete a folder, but want to keep some files of it. If you exclude a folder from cleanup the sub folders will not be excluded automatically too.
Example
- FolderA
- FolderA1
- File1
- File2
- File3
- File4
- FolderA1
- FolderB
Cleanup: "FolderA"
Exclude: "FolderA/FolderA1"
Result:
-
FolderA
- FolderA1
-
FolderB
User Mount Path
The user mount path page is located on the user profile page under the User Mount Path tab.
The user mount path page allows the user to view, add and delete paths that are mounted when the user logs into a virtual machine.
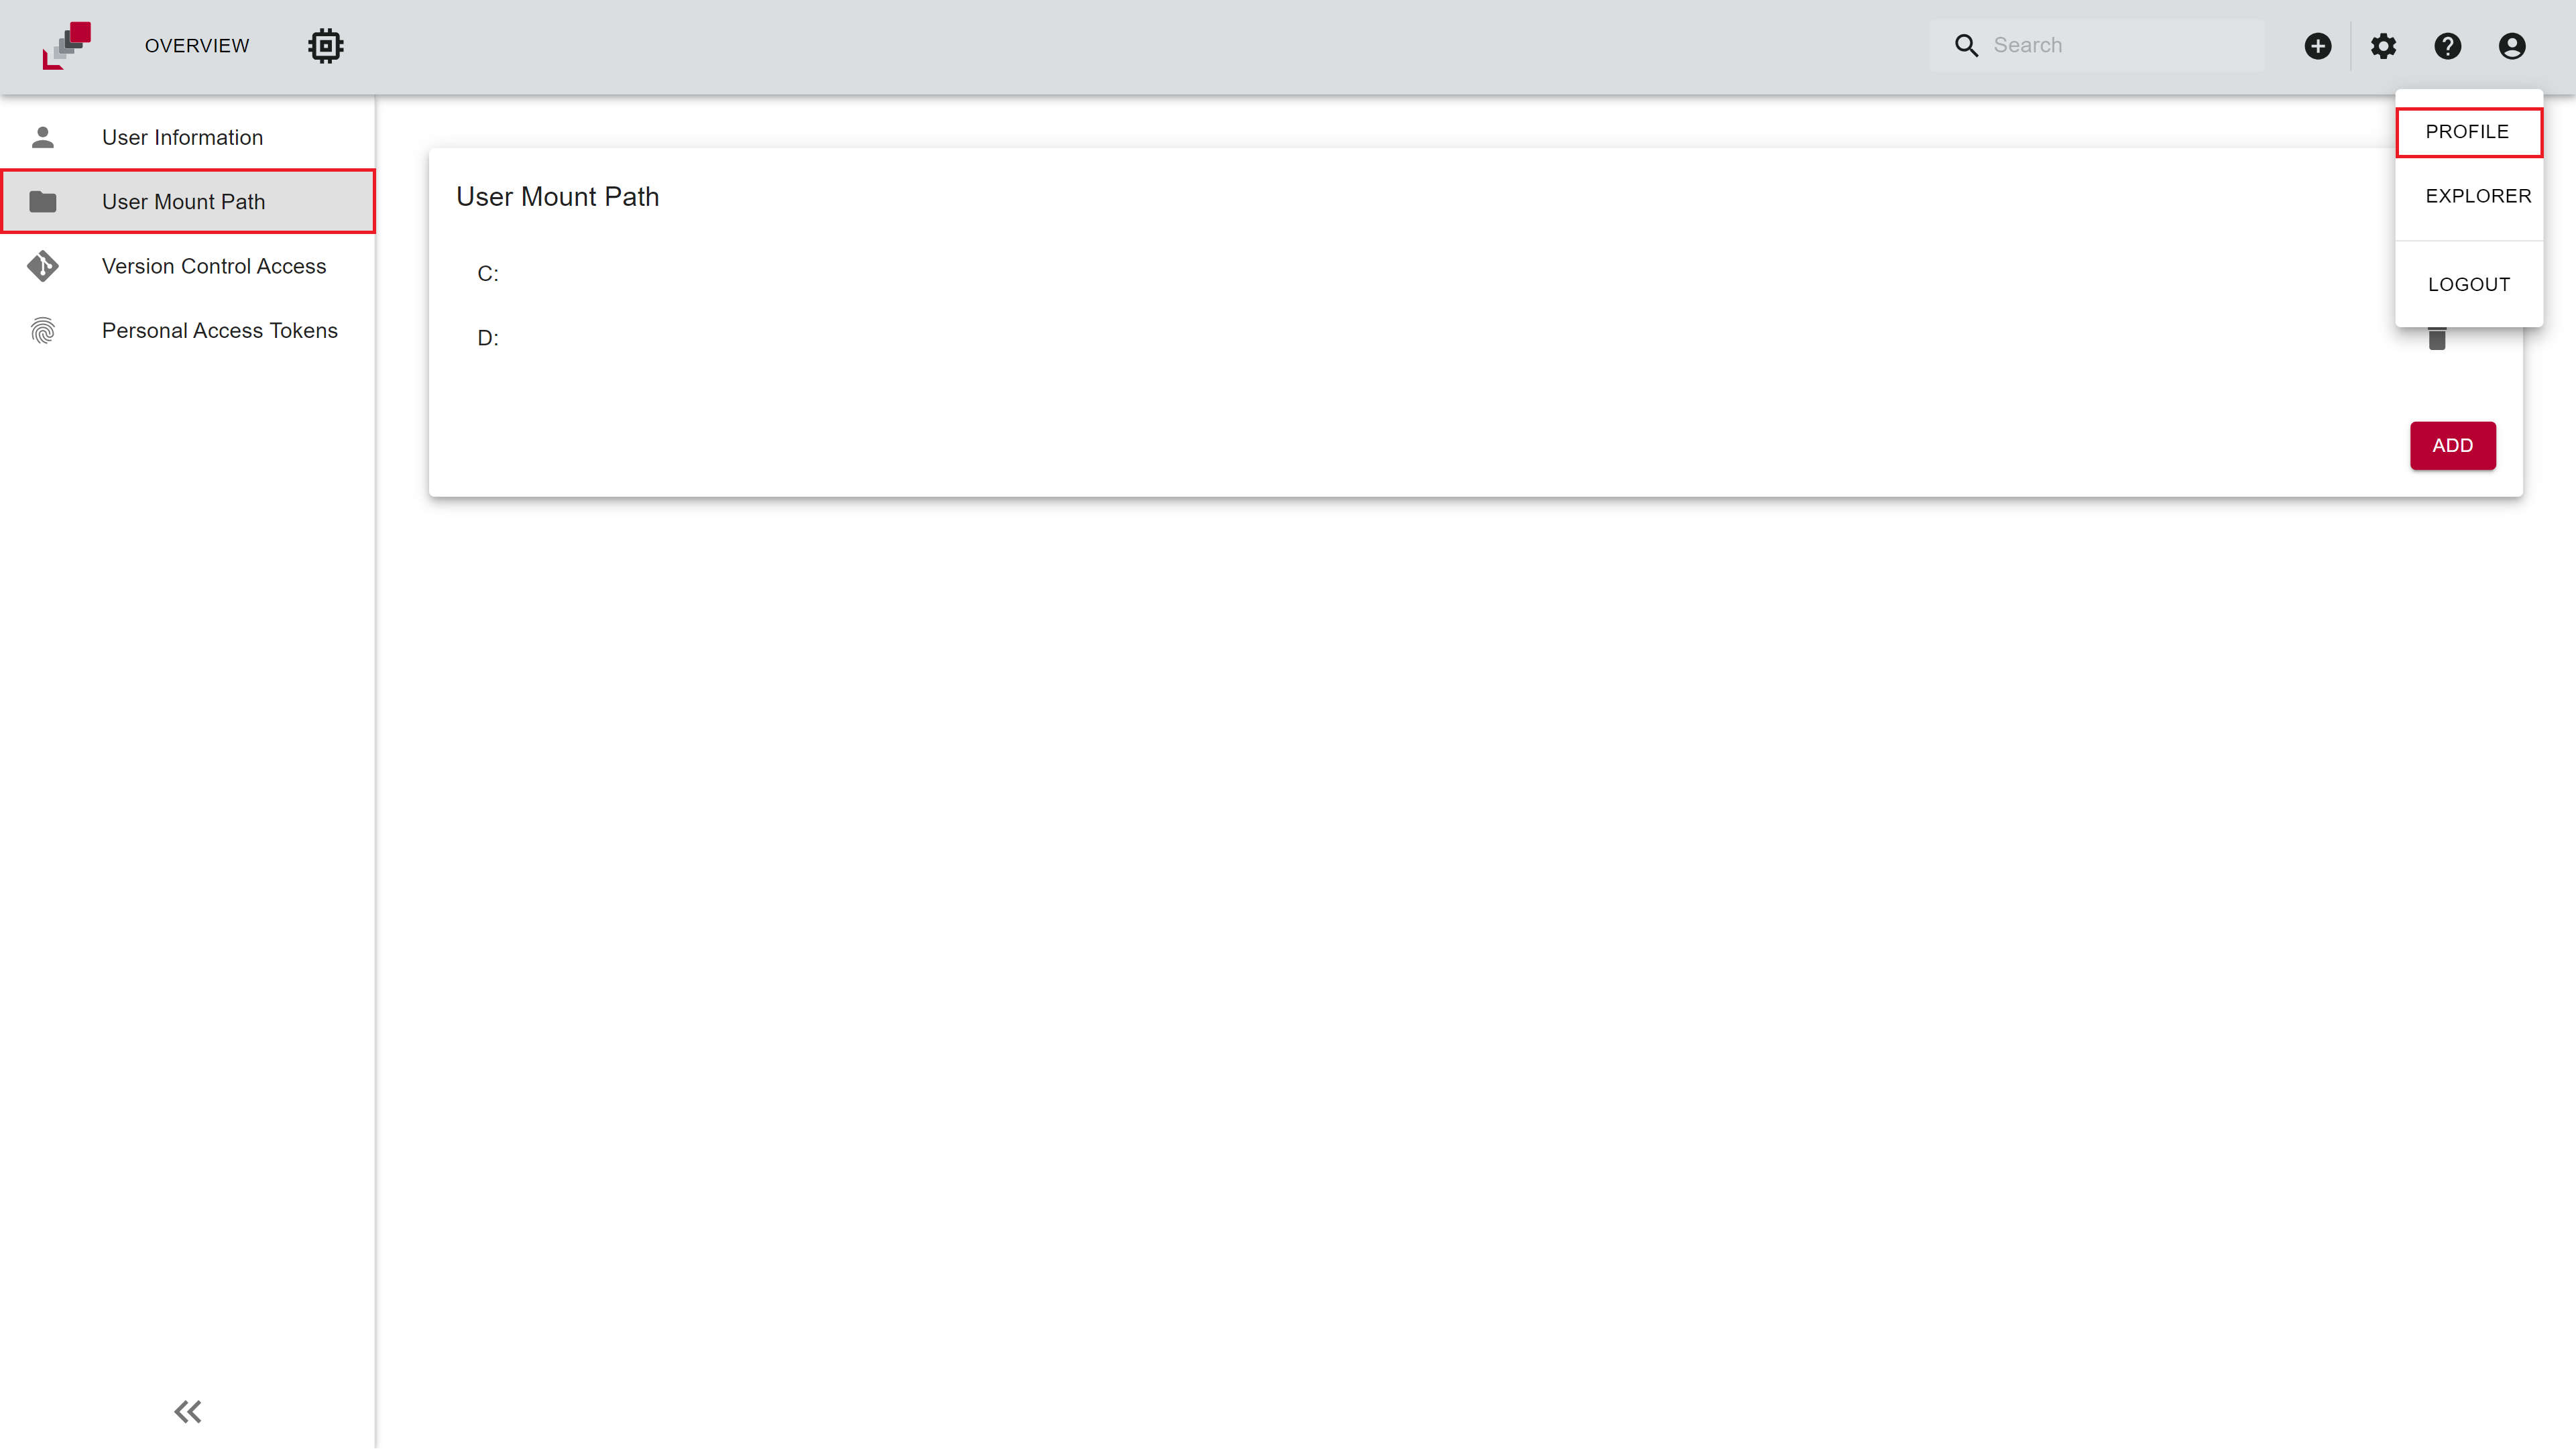
Functionality
- View Mount Paths: The user mount path page displays a list of all mount paths that are mounted when the user logs into a virtual machine.
- Create a new mount path: To create a new mount path, click on the
Addbutton. A modal will open where the user can select a drive that should be mounted upon connecting to a virtual machine. - Delete a mount path: To delete a mount path, click on the
 button next to the mount path that should be deleted.

Tutorial
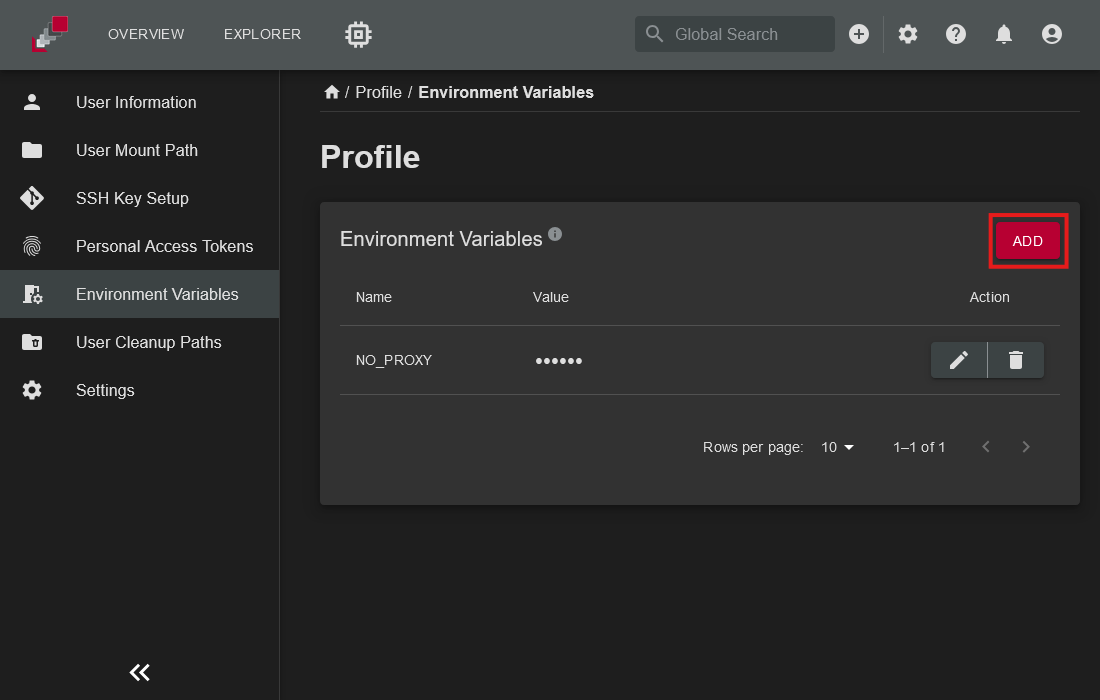
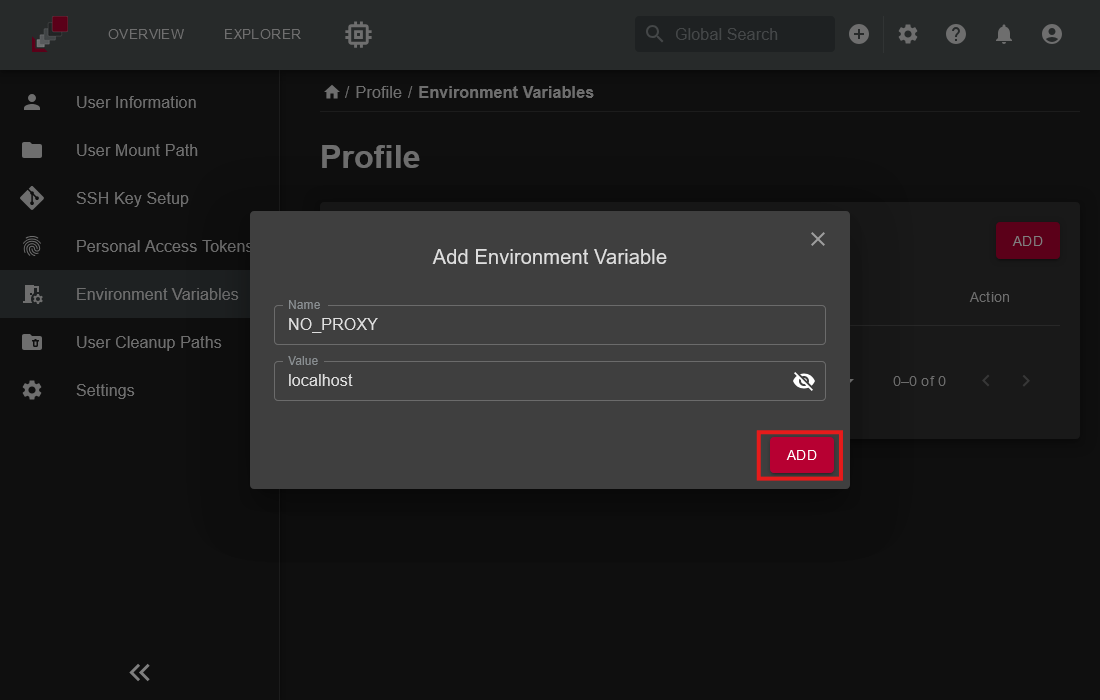
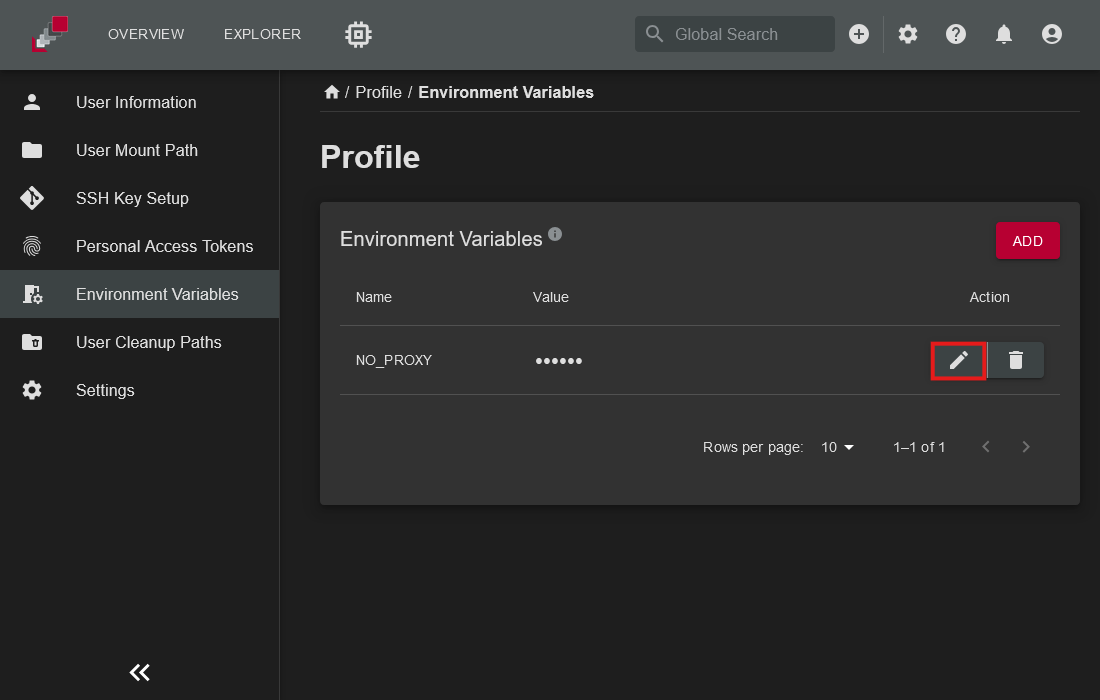
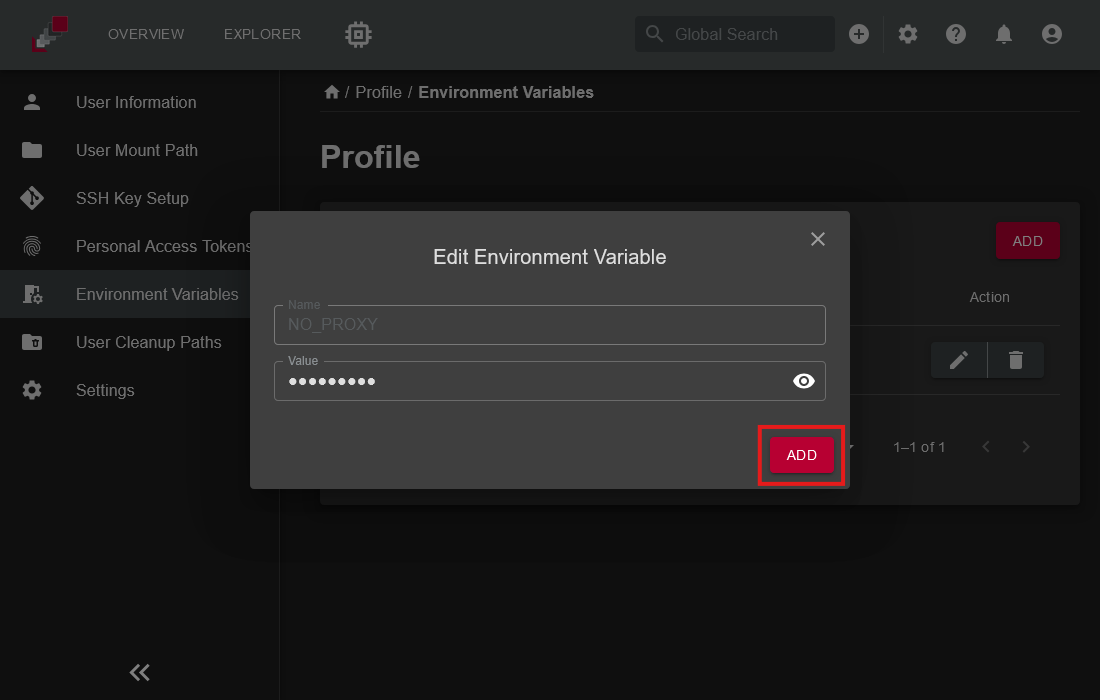
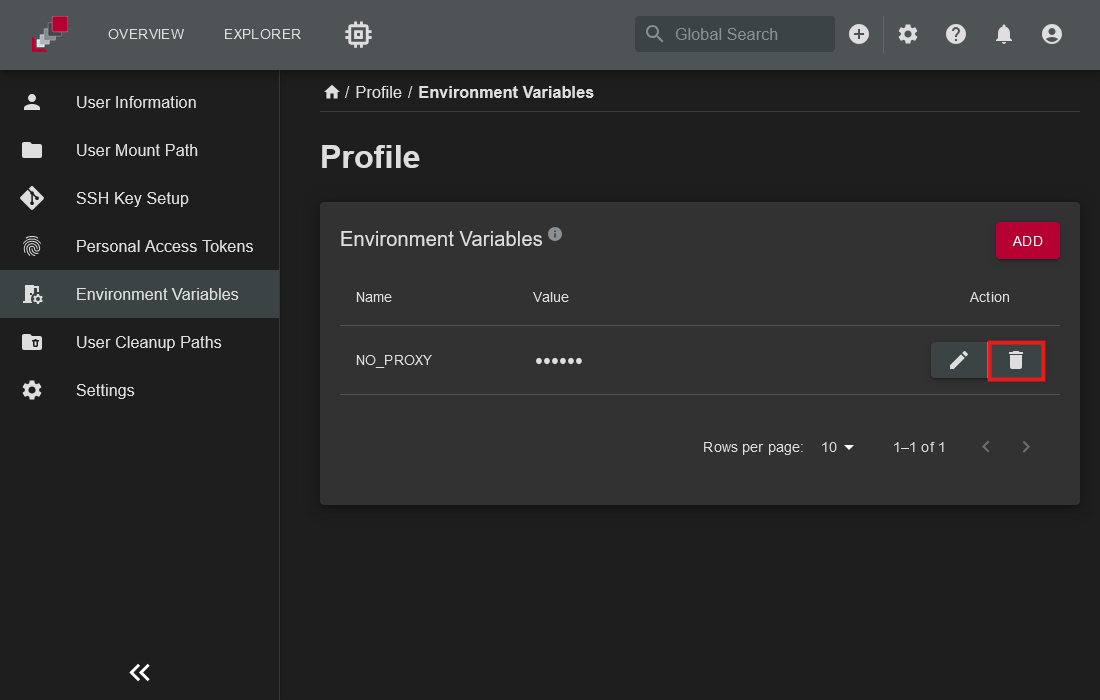
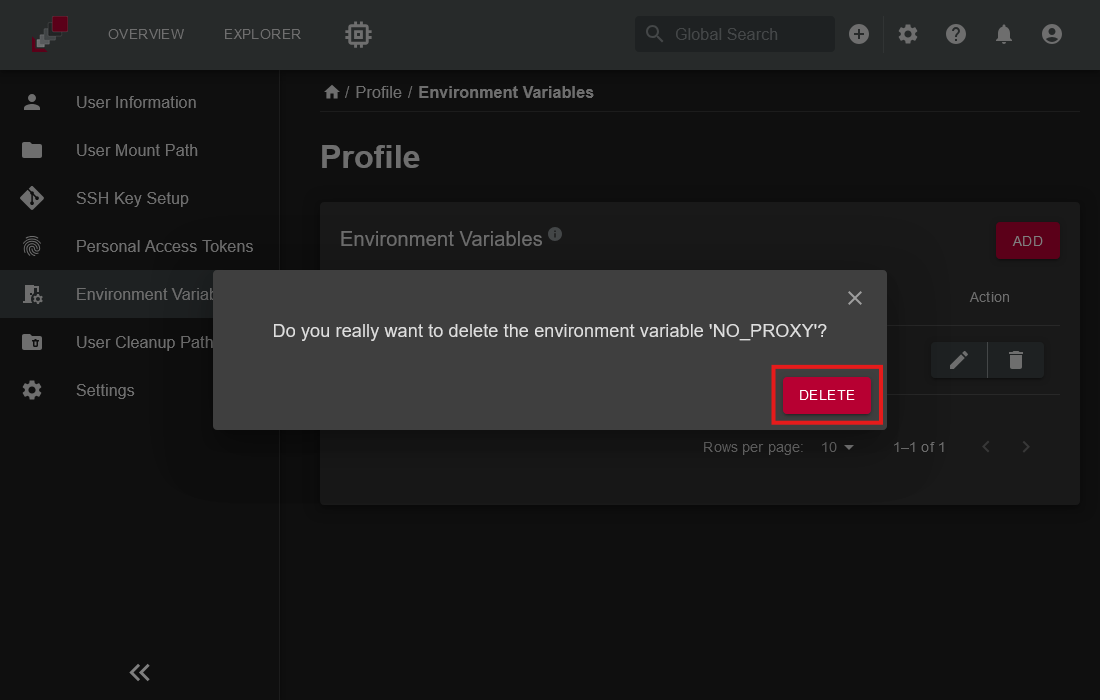
Environment variables
The environment variables view allows you to define custom variables that are automatically set at the beginning of a session on the virtual machine (VM). These variables are particularly useful for configuring the environment to meet the specific requirements of your application, such as setting paths, credentials, or other runtime configurations.
At the end of the session, all environment variables are automatically unset during cleanup to ensure no residual configurations persist on the VM, guaranteeing a clean and secure environment for subsequent sessions.
The environment variables defined here are tied to your personal user profile and are only available in sessions initiated by you. If you are working with organization-level or group-level tokens, you can configure environment variables as described in the Access-Tokens-Environment-Variables section. This ensures flexibility and consistency when managing environment configurations across different contexts.